Getting Started
So you’ve decided to improve your website by using ElasticPress.io, and you’re wondering how to get started. Wonder no more – here are the first steps to start taking advantage of your ElasticPress.io account.
How Does it Work
Install the ElasticPress WordPress plugin onto your site.
Connect to ElasticPress.io with the ElasticPress plugin.
You’re all set, start indexing your content.
Install the ElasticPress WordPress plugin onto your site
While you can connect to your ElasticPress.io endpoint with any Elasticsearch client, our ElasticPress plugin is the officially supported integration for our hosted service, and is the best way to integrate WordPress with Elasticsearch.
To install the plugin:
- Install the plugin using the Add Plugins screen in the WordPress administrative dashboard, or download a zipped up version via GitHub and upload it using the Upload Plugin option.
- Activate the plugin (network activate for multisite).
Connecting to ElasticPress.io with the ElasticPress plugin

Before the plugin can do anything for you, we have to configure it using the information provided from your ElasticPress.io account. When you first visit the dashboard for your newly installed ElasticPress plugin, you will see the setup steps. If you don’t yet have an account, you can sign up for one of our plans. If you already have an ElasticPress.io subscription, go ahead and hit the big red “Get started” button.
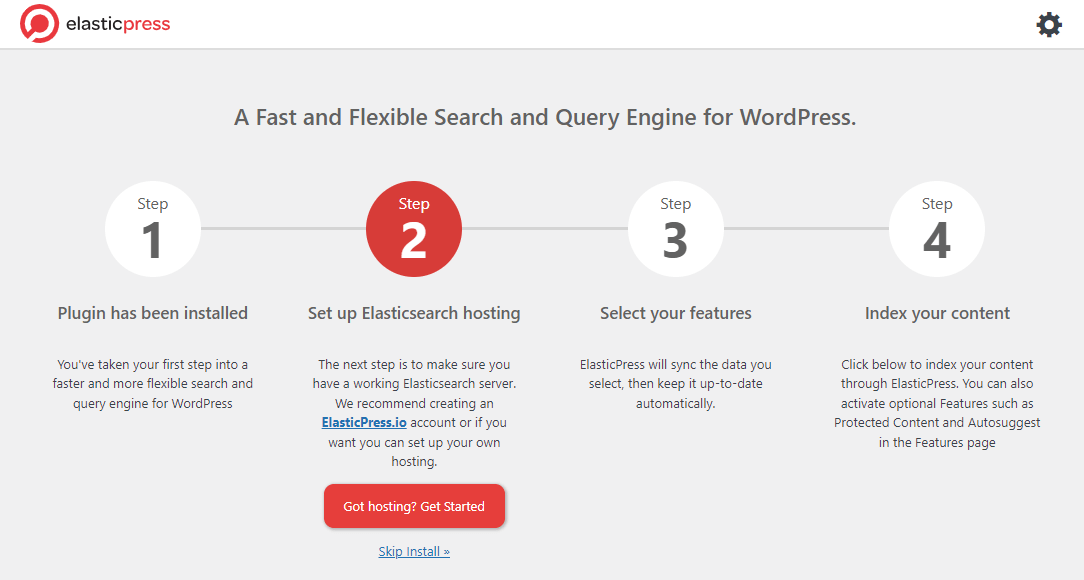
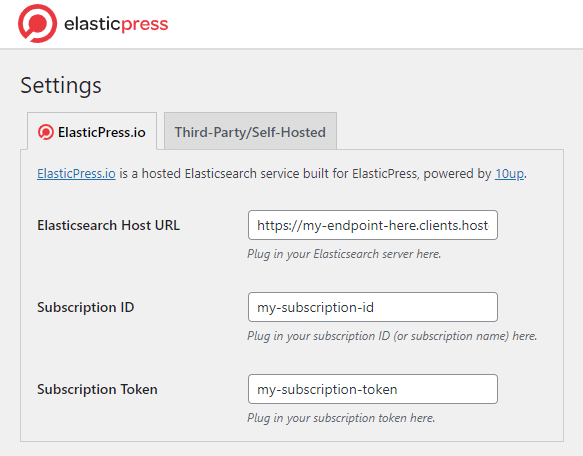
Once you have your account set up, come back to finish configuring the plugin. The “Got hosting? Get Started” button should take you to the Settings screen, where you can input your credentials from your ElasticPress.io account:
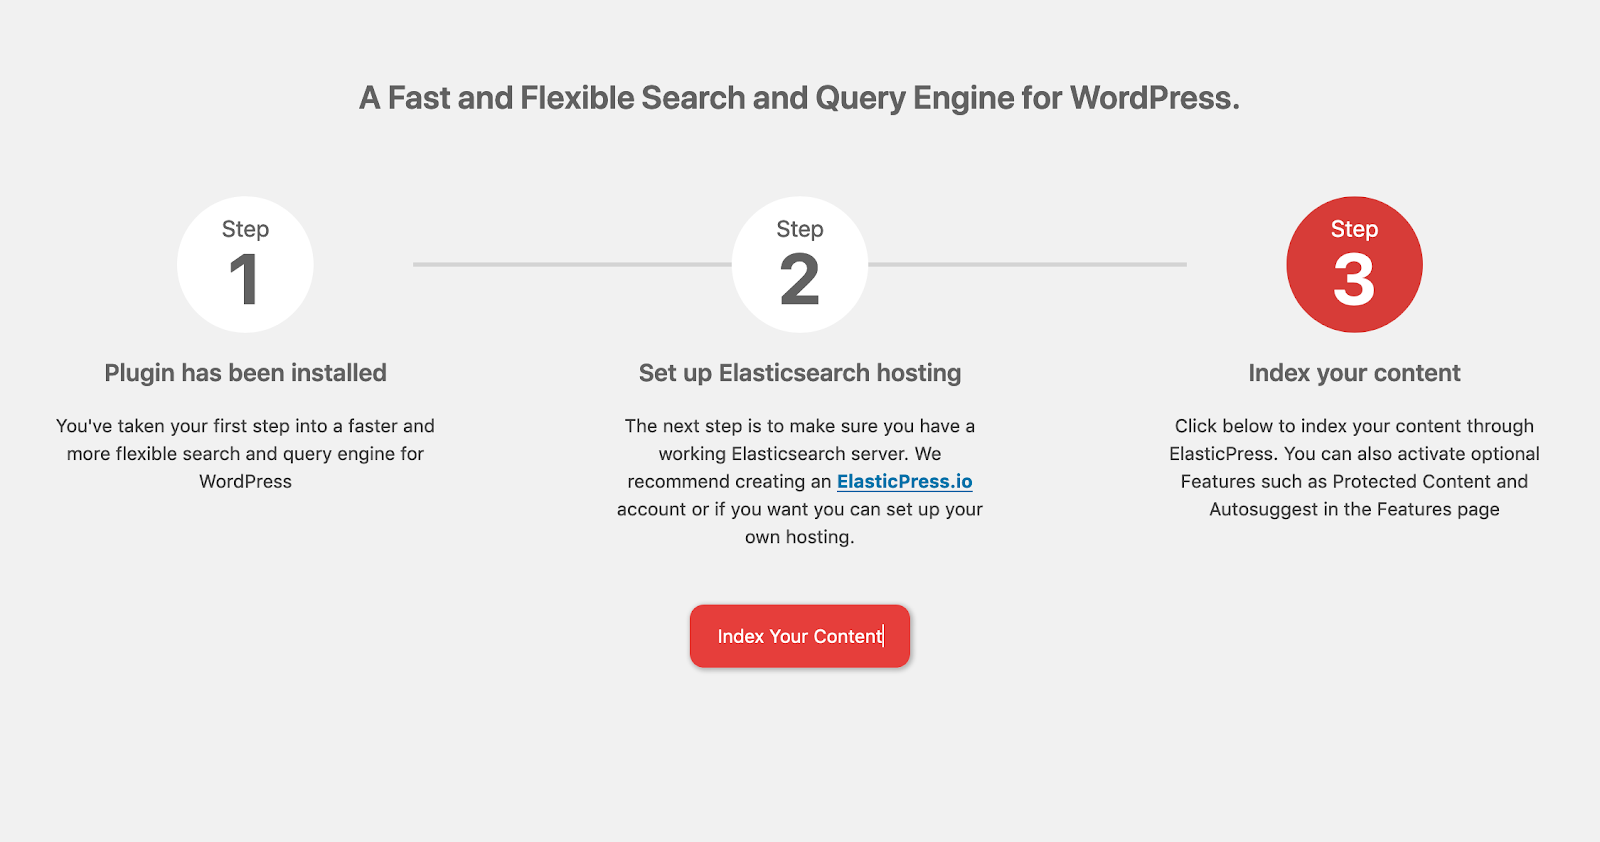
If you’re a code ninja/power user and have done this configuration in your wp-config.php file, you will have skipped step 2, and gone straight to step 3.
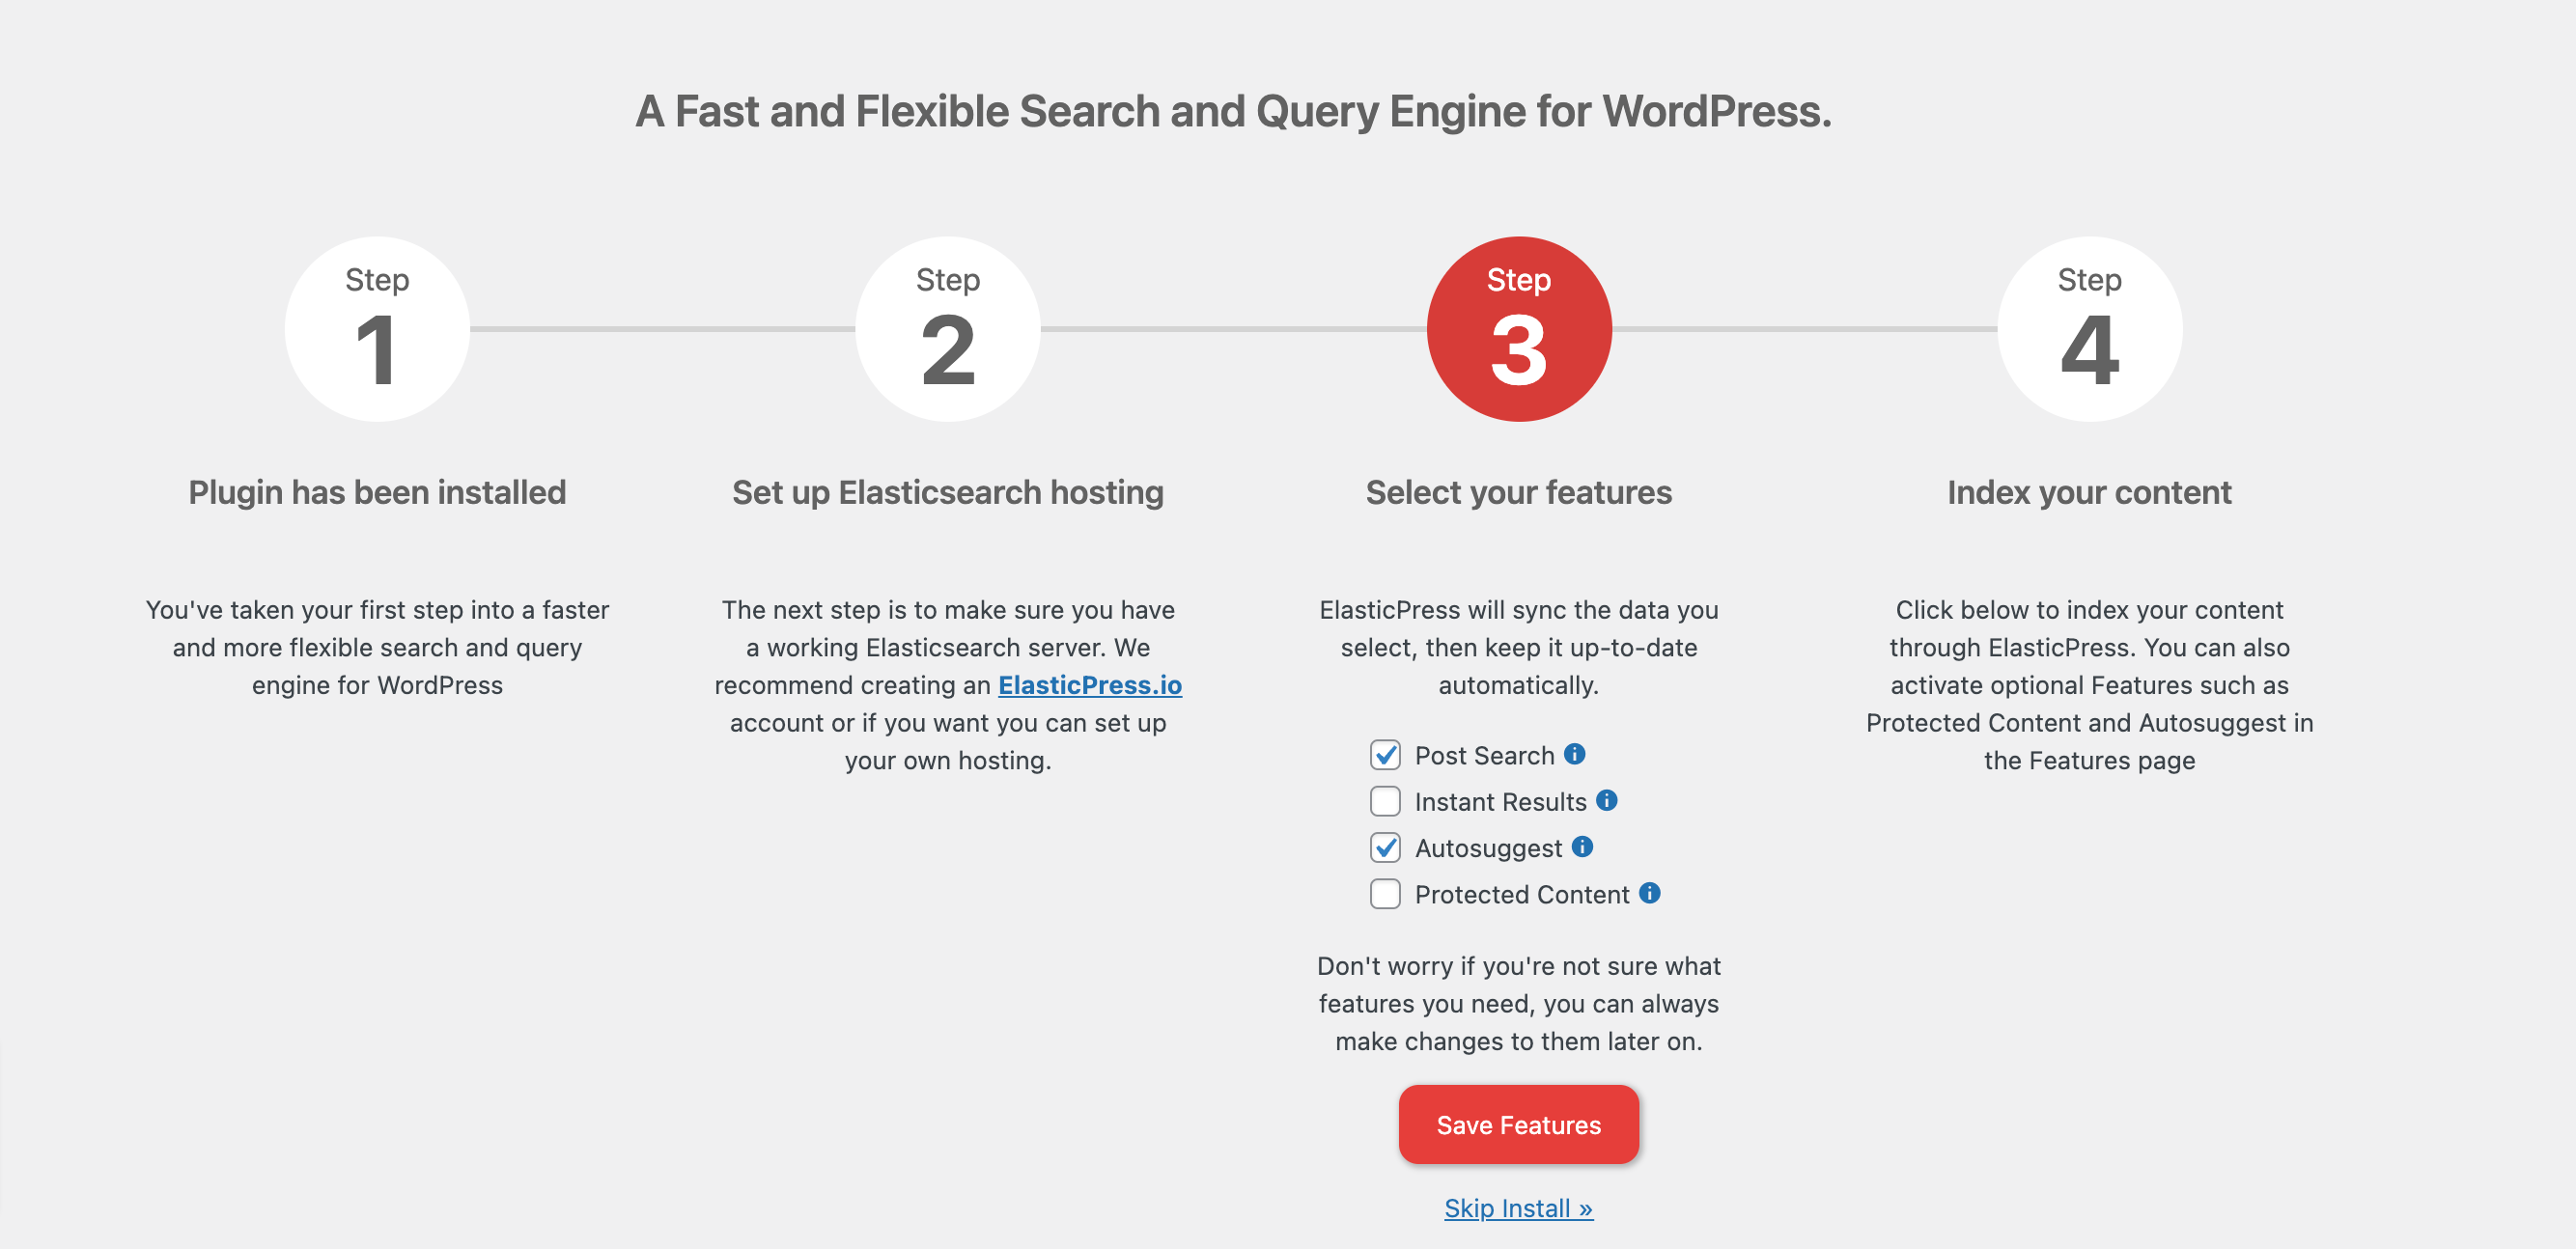
Select the ElasticPress features you want to start with and click on “Save Features”. Step 4 will now be selected.
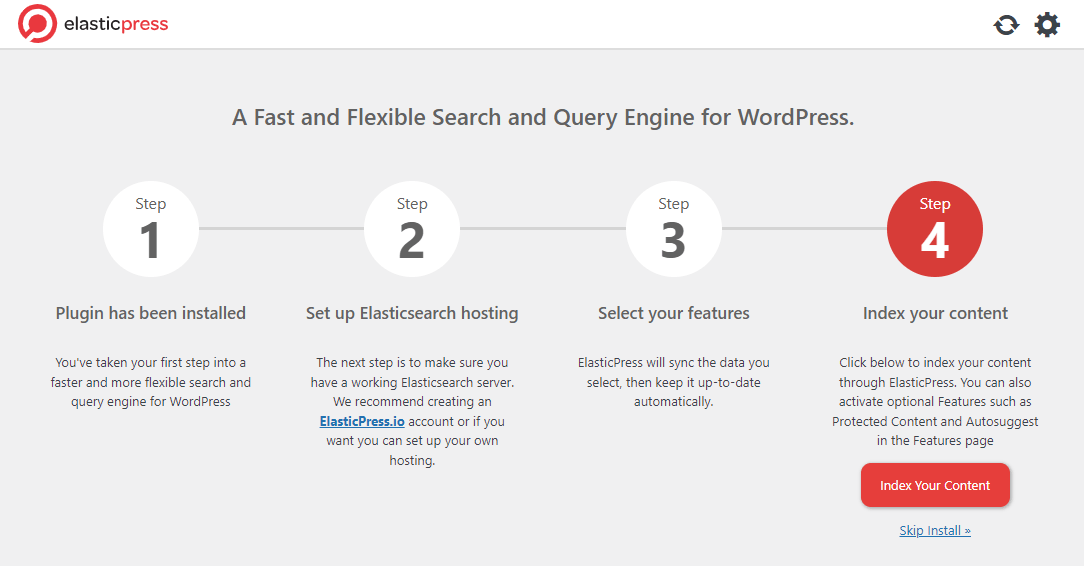
Hit the big red “Index your content” button, and it will synchronize your content up to the ElasticPress.io server for you.
Once your content is indexed, ElasticPress will seamlessly kick in behind the scenes and intelligently route search requests to ElasticPress.io.
When you’re done, you can go to the main dashboard to further configure the plugin to suit your needs.
So, how does it work?
Depending on which features you enabled in the settings screen, the plugin will improve everything from the quality of search results to filtered product browsing speed in WooCommerce, and can add related posts or the contents of uploaded documents to search results.
Whether for your own curiosity or for debugging purposes, if you want a glimpse into ElasticPress.io queries you can install the Debug Bar and ElasticPress Debugging Add-On plugins to see “under the hood” as content is pulled from the ElasticPress index.
We’ve previously covered some debugging tips on our blog.
Where Do I Go Next?
- Check out our Documentation
- See how others are using ElasticPress.io
- Stuck? Access your account and open a support ticket!